Add a custom fontUpdated 6 months ago
Important note: Any adjustments you make in the code of a theme will be lost when updating. So if you use a custom font you will need to repeat these steps whenever you update your theme.
If your font is not available in Shopify, you can still use it — this just requires a small setup. This is optional and best suited if you already have a specific brand font.
You can add a custom font in two ways:
- Adobe Fonts (Typekit) – easiest option if your font is hosted there
- Uploading font files – if you have the font files yourself
In both cases:
- The font can be used for headings and/or body text
- A small code change is required
- We recommend making a theme backup first
Adobe Fonts (Typekit)
If your font is hosted on Adobe Fonts (Typekit):
Copy the
<link>tag provided by Adobe FontsGo to Online Store → Themes → … → Edit code
Open the file:
fonts.liquidPaste the Adobe Fonts
<link>tag at the top of the file and save the file
Assigning the font
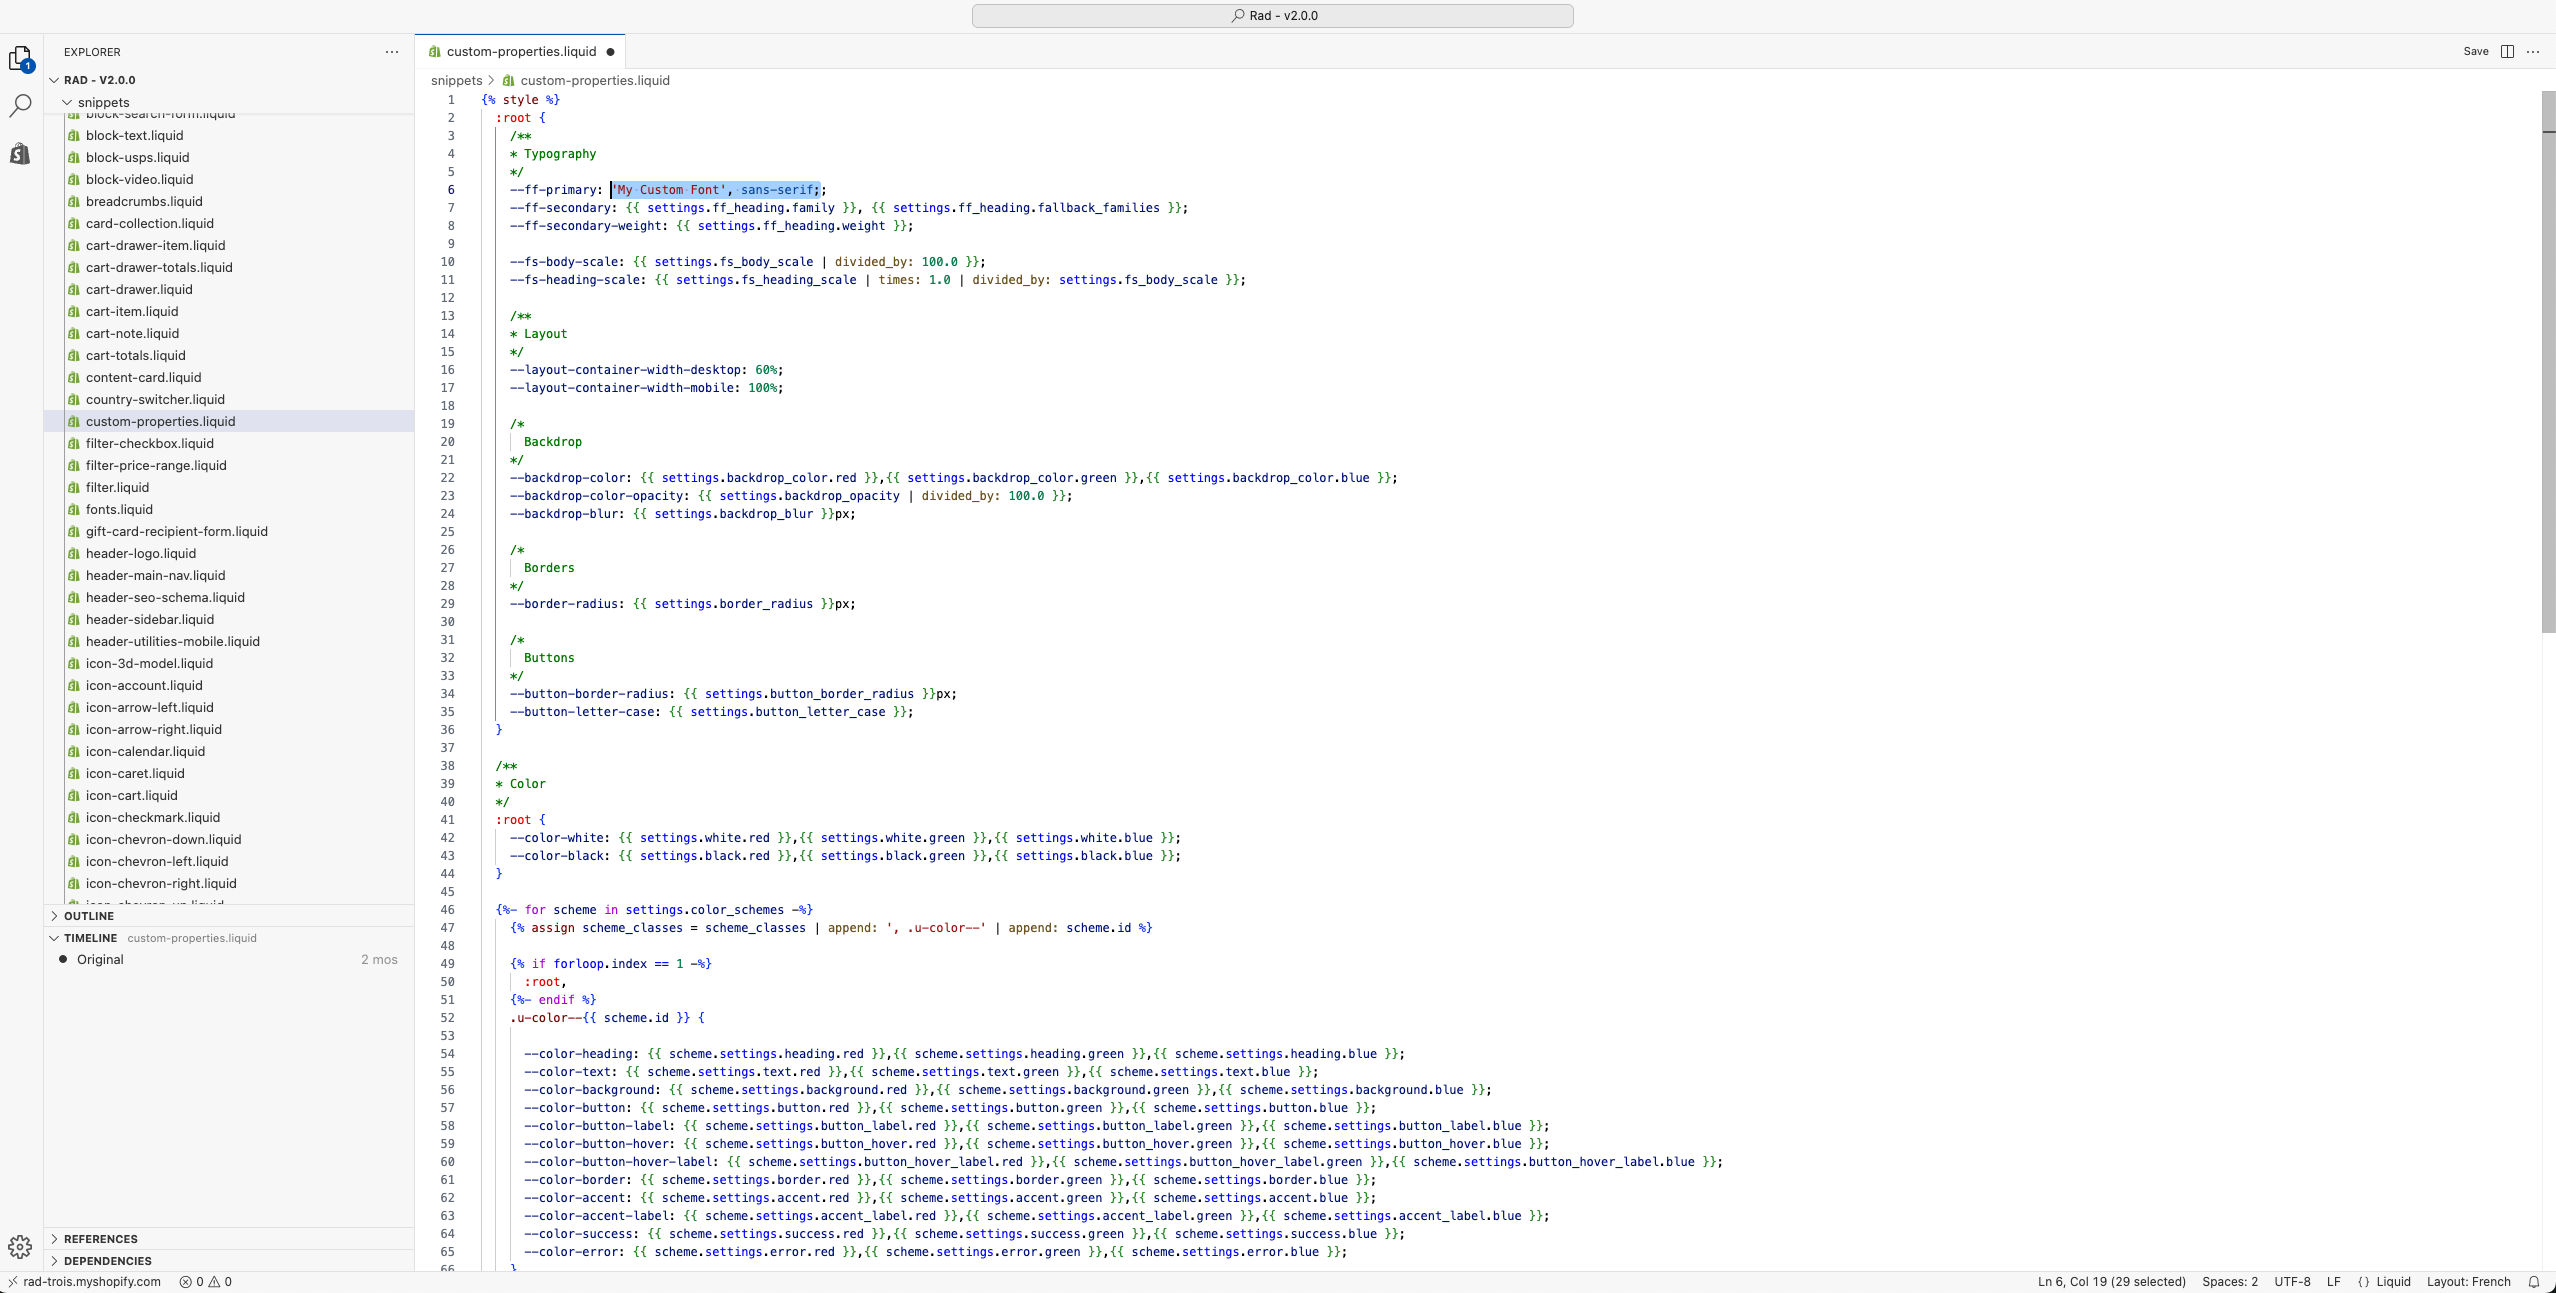
Open
custom-properties.liquidLocate the typography variables:
--ff-primary→ This is the body font--ff-secondary→ This is the heading font
Replace the value with your font name (you can find your font name in Adobe Typekit), for example:
'My Custom Font', sans-serif;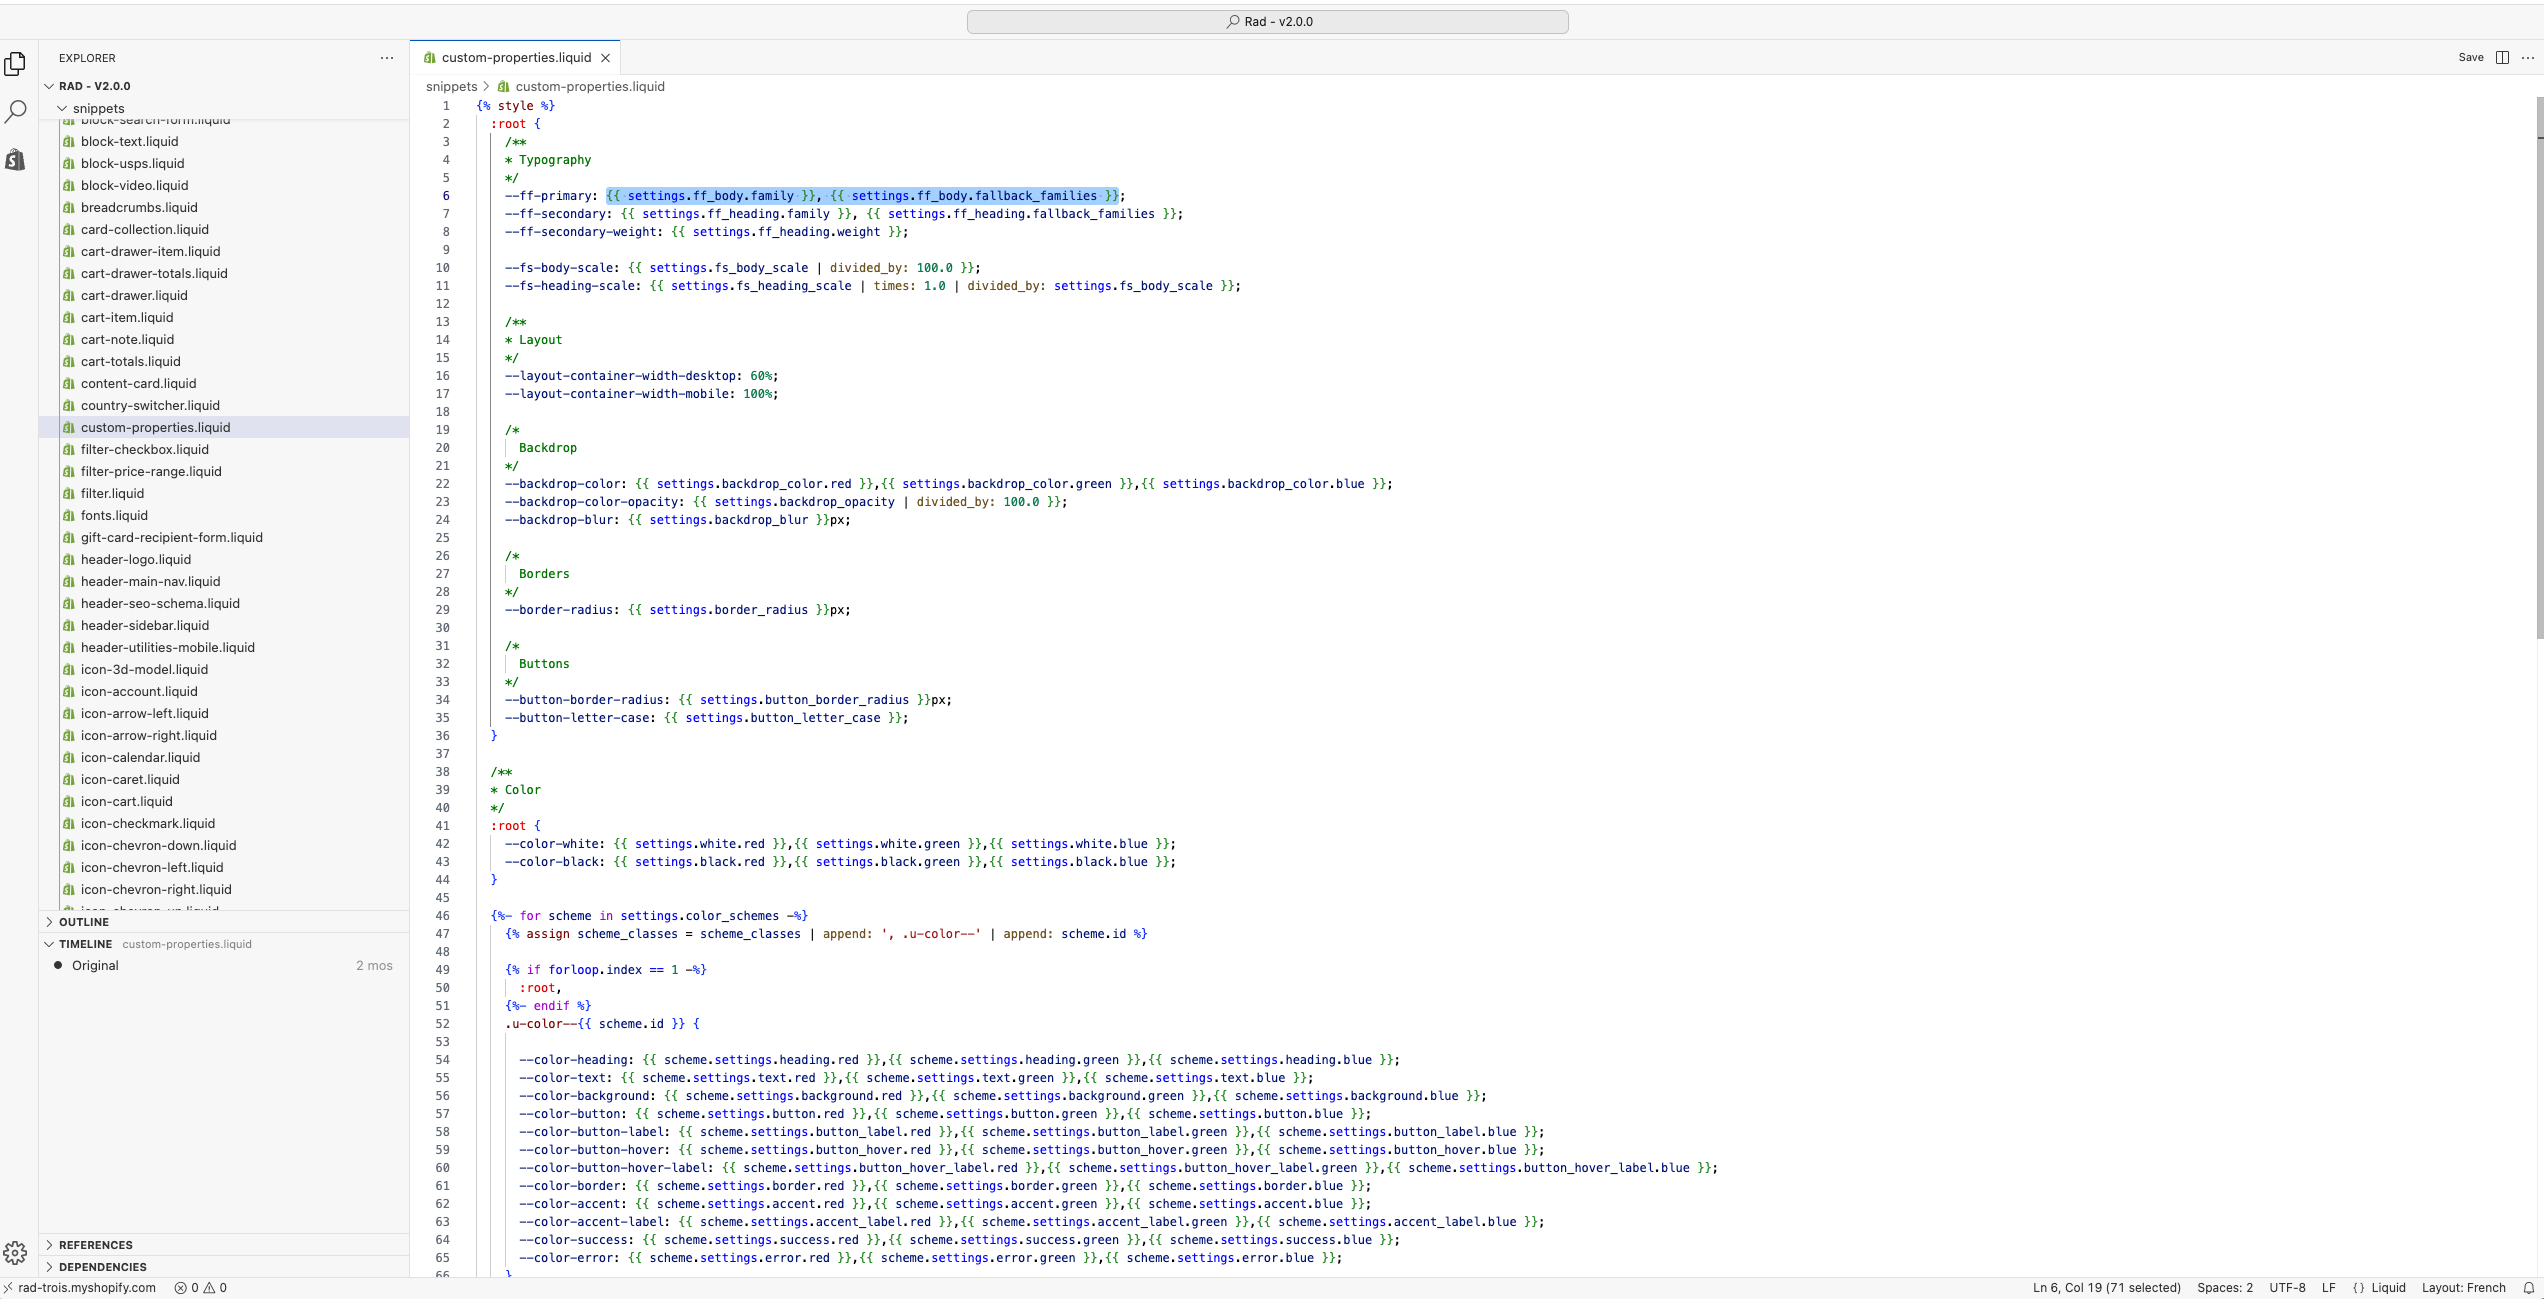
Uploading font files
You can also upload your own font files.
Required formats
Minimum: OTF and WOFF
Recommended: EOT, WOFF2, WOFF, TTF, SVG
Steps
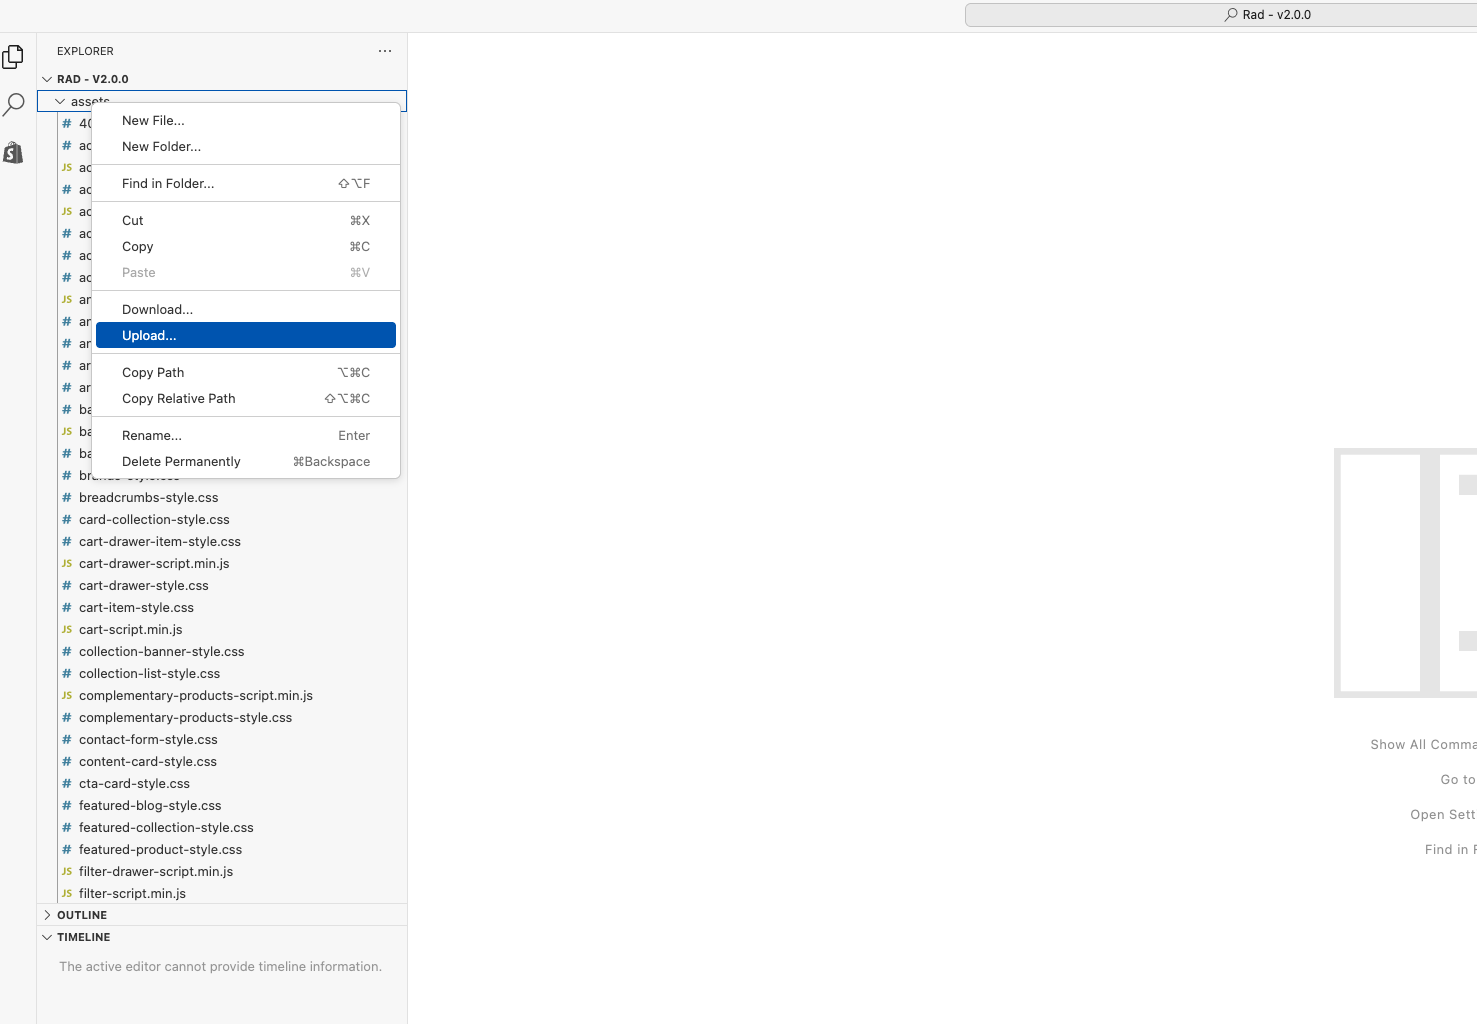
Upload the font files via Edit code → Assets (Right click on assets folder > upload and select your font files)
Open
fonts.liquidAdd your
@font-facedeclaration inside<style>tags- 1<style>2 @font-face {3 font-family: 'My Custom Font';4 font-style: normal;5 font-weight: 400;6 font-display: swap;7 src: url({{ 'my-custom-font.eot' | asset_url }});8 src: url({{ 'my-custom-font.eot?#iefix' | asset_url }}) format('embedded-opentype'),9 url({{ 'my-custom-font.woff2' | asset_url }}) format('woff2'),10 url({{ 'my-custom-font.woff' | asset_url }}) format('woff'),11 url({{ 'my-custom-font.ttf' | asset_url }}) format('truetype'),12 url({{ 'my-custom-font.svg' | asset_url }}) format('svg');13 }14</style>
Remove any lines for file formats you don’t have. For example
<style>
  @font-face {
    font-family: 'My Custom Font';
    font-style: normal;
    font-weight: 400;
    font-display: swap;
    src: url({{ 'my-custom-font.woff' | asset_url }}) format('woff'),
         url({{ 'my-custom-font.otf' | asset_url }}) format('opentype');
  }
</style>
Open
custom-properties.liquidLocate the typography variables:
--ff-primary→ This is the body font--ff-secondary→ This is the heading font
Replace the value with your font name (you can find your font name in Adobe Typekit), for example:
'My Custom Font', sans-serif;

Save everything and enjoy your new font!